
Installation d’un serveur Lamp sur une distribution Linux Debian 9 + PhpmyAdmin + Owncloud 10.
Debian 9
Mise à jour de la distribution
$ apt-get update && apt-get upgrade
Sécurisation de la distribution
Configurer SSH
Un accès SSH est indispensable pour administrer un serveur web, voici quelques bases pour sécuriser votre accès. Éditer le fichier de configuration SSH avec l’éditeur de votre choix :
$ nano /etc/ssh/sshd_config
Puis modifier les lignes suivantes:
Port 2208 # Changer le port par défaut pour des raisons de sécurité
PermitRootLogin no # Interdire la connexion avec le compte root
AllowUsers toto # Autoriser le compte utilisateur toto à se connecter en SSH
Redémarrer le service SSH :
$ /etc/init.d/ssh restart
Après cette modification, on se connecte avec un client SSH sous le compte “stef” puis on ouvre une session avec l’utilisateur root depuis la console (en tapant su root).
Installation du pare-feu ufw :
$ apt-get install ufw
$ ufw enable
$ ufw app list
Ouverture des ports 80 (http), 2208 (SSH) et 443 (https) :
$ ufw allow ‘WWW Full’
$ ufw allow 2208
Apache
Installation du serveur web Apache 2
$ apt-get install apache2 apache2-doc apache2-utils
mod_rewrite
On active le “mod_rewrite” utilisé pour la réécriture d’URL:
$ a2enmod rewrite
On crée le fichier de configuration personnalisé:
$ nano /etc/apache2/conf-available/custom.conf
Et ajouter y ces lignes pour activer “mod_rewrite”:
#Rewrite engine On
<ifModule mod_rewrite.c>
RewriteEngine On
</ifModule>
On enregistre le fichier puis on active la nouvelle configuration:
$ a2enconf custom
Puis on redémarre le service apache2:
$ /etc/init.d/apache2 restart
Tester le fonctionnement d’ Apache 2
On vérifie le bon fonctionnement du serveur apache en visitant l’adresse du serveur:
http://www.bremsstrahlung.fr
La page de bienvenue comme ci-dessous doit s’afficher.
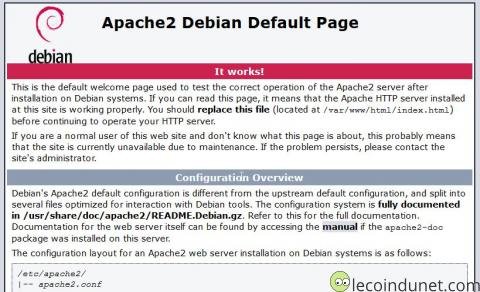
Par défaut, le dossier qui contiendra les sites web se situe dans /var/www/html. Par mesure de sécurité, il vaut mieux remplacer ou supprimer le fichier /var/www/html/index.html.
Getting Familiar with Important Apache Files and Directories
Now that you know how to manage the Apache service itself, you should take a few minutes to familiarize yourself with a few important directories and files.
Content
/var/www/html: The actual web content, which by default only consists of the default Apache page you saw earlier, is served out of the /var/www/html directory. This can be changed by altering Apache configuration files.
Server Configuration
/etc/apache2: The Apache configuration directory. All of the Apache configuration files reside here.
/etc/apache2/apache2.conf: The main Apache configuration file. This can be modified to make changes to the Apache global configuration. This file is responsible for loading many of the other files in the configuration directory.
/etc/apache2/ports.conf: This file specifies the ports that Apache will listen on. By default, Apache listens on port 80 and additionally listens on port 443 when a module providing SSL capabilities is enabled.
/etc/apache2/sites-available/: The directory where per-site virtual hosts can be stored. Apache will not use the configuration files found in this directory unless they are linked to the sites-enabled directory. Typically, all server block configuration is done in this directory, and then enabled by linking to the other directory with the a2ensite command.
/etc/apache2/sites-enabled/: The directory where enabled per-site virtual hosts are stored. Typically, these are created by linking to configuration files found in the sites-available directory with the a2ensite. Apache reads the configuration files and links found in this directory when it starts or reloads to compile a complete configuration.
/etc/apache2/conf-available/, /etc/apache2/conf-enabled/: These directories have the same relationship as the sites-available and sites-enabled directories, but are used to store configuration fragments that do not belong in a virtual host. Files in the conf-available directory can be enabled with the a2enconf command and disabled with the a2disconf command.
/etc/apache2/mods-available/, /etc/apache2/mods-enabled/: These directories contain the available and enabled modules, respectively. Files in ending in .load contain fragments to load specific modules, while files ending in .conf contain the configuration for those modules. Modules can be enabled and disabled using the a2enmod and a2dismod command.
Server Logs
/var/log/apache2/access.log: By default, every request to your web server is recorded in this log file unless Apache is configured to do otherwise.
/var/log/apache2/error.log: By default, all errors are recorded in this file. The LogLevel directive in the Apache configuration specifies how much detail the error logs will contain.
To stop your web server, type :
$ systemctl stop apache2
To start the web server when it is stopped, type:
$ systemctl start apache2
To stop and then start the service again, type:
$ systemctl restart apache2
If you are simply making configuration changes, Apache can often reload without dropping connections. To do this, use this command:
$ systemctl reload apache2
By default, Apache is configured to start automatically when the server boots. If this is not what you want, disable this behavior by typing:
$ systemctl disable apache2
To re-enable the service to start up at boot, type:
$ systemctl enable apache2
Apache should now start automatically when the server boots again.

MariaDB
Pour installer MariaDB sous Debian 9, on tape:
$ apt-get install software-properties-common
$ apt-get update
$ apt-get install dirmngr
$ apt-key adv –recv-keys –keyserver keyserver.ubuntu.com 0xF1656F24C74CD1D8
Puis:
$ add-apt-repository ‘deb [arch=amd64] http://fr.mirror.babylon.network/mariadb/repo/10.2/debian stretch main’
Une fois la clé importée et les dépots ajoutés, on installe MariaDB:
$ apt-get update
$ apt-get install mariadb-server
Adjusting User Authentication and Privileges
In Debian systems running MariaDB 10.1, the root MariaDB user is set to authenticate using the unix_socket plugin by default rather than with a password. This allows for some greater security and usability in many cases, but it can also complicate things when you need to allow an external program (e.g., phpMyAdmin) administrative rights.
Because the server uses the root account for tasks like log rotation and starting and stopping the server, it is best not to change the root account’s authentication details. Changing the account credentials in the /etc/mysql/debian.cnf may work initially, but package updates could potentially overwrite those changes. Instead of modifying the root account, the package maintainers recommend creating a separate administrative account if you need to set up password-based access.
To do so, we will be creating a new account called admin with the same capabilities as the root account, but configured for password authentication. To do this, open up the MariaDB prompt from your terminal:
$ mysql
Now, we can create a new user with root privileges and password-based access. Change the username and password to match your preferences:
-
GRANT ALL ON *.* TO ‘admin’@’localhost’ IDENTIFIED BY ‘password’ WITH GRANT OPTION;
Flush the privileges to ensure that they are saved and available in the current session:
-
FLUSH PRIVILEGES;
Following this, exit the MariaDB shell:
-
exit
exit
1. Database creation
mysql> CREATE DATABASE `mydb`;
2. User creation
mysql> CREATE USER ‘myuser’ IDENTIFIED BY ‘mypassword’;
3. Grant permissions to access and use the MySQL server
Only allow access from localhost (this is the most secure and common configurationyou will use for a web application):
mysql> GRANT USAGE ON *.* TO ‘myuser’@localhost IDENTIFIED BY ‘mypassword’;
To allow access to MySQL server from any other computer on the network:
mysql> GRANT USAGE ON *.* TO ‘myuser’@’%’ IDENTIFIED BY ‘mypassword’;
4. Grant all privileges to a user on a specific database
mysql> GRANT ALL privileges ON `mydb`.* TO ‘myuser’@localhost;
As in the previous command, if you want the user to work with the database from any location you will have to replace localhost with ‘%’.
5. Apply changes made
To be effective the new assigned permissions you must finish with the following command:
mysql> FLUSH PRIVILEGES;
6. Verify your new user has the right permissions
mysql> SHOW GRANTS FOR ‘myuser’@localhost;
+————————————————————–+
| Grants for myuser@localhost |
+————————————————————–+
| GRANT USAGE ON *.* TO ‘myuser’@’localhost’ |
| GRANT ALL PRIVILEGES ON `mydb`.* TO ‘myuser’@’localhost’ |
+————————————————————–+
2 rows in set (0,00 sec)
PHP7
Before starting with this tutorial, make sure you are logged in as a user with sudo privileges.
Installing PHP 7.2 on Debian 9
The following steps describe how to install PHP 7.2 using the Ondrej Sury repository.
First, update the apt package list and install the dependencies necessary to add a new repository over HTTPS:
$ apt update
$ apt install apt-transport-https ca-certificates curl software-properties-common
Start by importing the repository’s GPG key using the following curl command:
$ curl -fsSL https://packages.sury.org/php/apt.gpg | apt-key add –
Add the ondrej’s repository to your system’s software repository list by typing:
$ add-apt-repository « deb https://packages.sury.org/php/ $(lsb_release -cs) main »
Now that we have the ondrej’s repository enabled on our system, we can install PHP by specifying the version we want to use:
$ apt update
$ apt install php7.2-common php7.2-cli
Verify the installation, by running the following command which will print the PHP version.
php –v
PHP 7.2.8-1+0~20180725124257.2+stretch~1.gbp571e56 (cli) (built: Jul 25 2018 12:43:00) ( NTS )
Copyright (c) 1997-2018 The PHP Group
Zend Engine v3.2.0, Copyright (c) 1998-2018 Zend Technologies
with Zend OPcache v7.2.8-1+0~20180725124257.2+stretch~1.gbp571e56, Copyright (c) 1999-2018, by Zend Technologies
Install PHP 7.2 using the following command:
sudo apt-get install php7.2 php7.2-cli php7.2-common
Step 5: Search and install specific PHP 7.2 extensions
If you want to install a specific PHP 7.2 extension, you can search if it is available using the following command:
sudo apt search php7.2
Step 7: Install most commonly used PHP extensions
To install the most commonly used PHP extensions you can use the following command:
sudo apt-get install php7.2-curl php7.2-gd php7.2-json php7.2-mbstring php7.2-intl php7.2-mysql php7.2-xml php7.2-zip
If you are using Apache as your web server to install PHP and Apache PHP module run the following command:
$ apt install php7.2 libapache2-mod-php
Once the packages are installed to enable the php7.2 module just restart the Apache service:
$ systemctl restart apache2
We can extend the core functionality of PHP by installing additional extensions. PHP extensions are available as packages and can be easily installed with:
$ apt install php-[extname]
For example if you want to install MySQL and GD PHP extensions you should run the following command:
$ apt install php7.2-mysql php7.2-gd
After installing a new PHP extension do not forget to restart the Apache or the PHP FPM service, depending on your setup.
To test whether your web server is configured properly for PHP processing, create a new file called info.php inside the /var/www/html directory with the following code:
/var/www/html/info.php
<?php
phpinfo();
?>
Save the file, open your browser of choice and visit http://your_server_ip/info.php
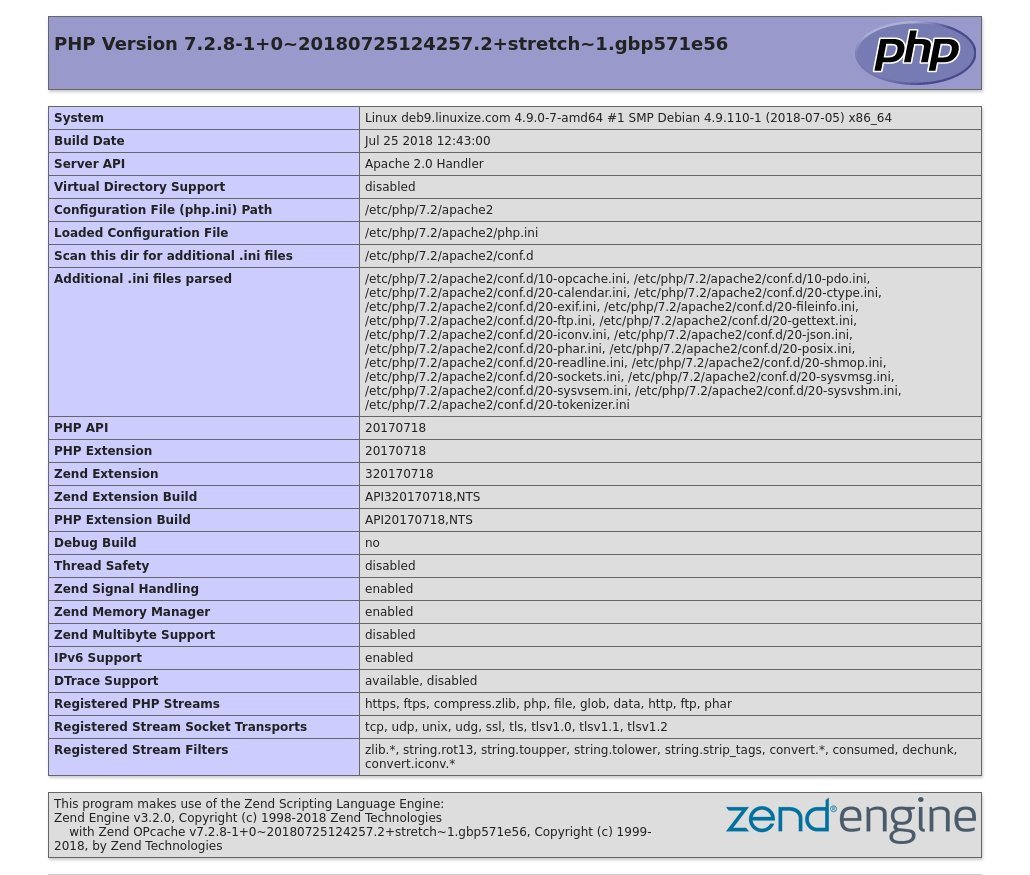
The phpinfo function will print information about your PHP configuration as shown on the image bellow:
PhpMyAdmin
Introduction
While many users need the functionality of a database management system like MariaDB, they may not feel comfortable interacting with the system solely from the MariaDB prompt.
phpMyAdmin was created so that users can interact with MariaDB through a web interface. In this guide, we’ll discuss how to install and secure phpMyAdmin so that you can safely use it to manage your databases on a Debian 9 system.
Prerequisites
Before you get started with this guide, you need to have some basic steps completed.
First, we’ll assume that your server has a non-root user with sudo privileges, as well as a firewall configured with ufw, as described in the initial server setup guide for Debian 9.
We’re also going to assume that you’ve completed a LAMP (Linux, Apache, MariaDB, and PHP) installation on your Debian 9 server. If you’ve not yet done this, follow our guide on installing a LAMP stack on Debian 9 to set this up.
Finally, there are important security considerations when using software like phpMyAdmin, since it:
Communicates directly with your MariaDB installation
Handles authentication using MariaDB credentials
Executes and returns results for arbitrary SQL queries
For these reasons, and because it is a widely-deployed PHP application which is frequently targeted for attack, you should never run phpMyAdmin on remote systems over a plain HTTP connection. If you do not have an existing domain configured with an SSL/TLS certificate, you can follow this guide on securing Apache with Let’s Encrypt on Debian 9. This will require you to register a domain name, create DNS records for your server, and set up an Apache Virtual Host.
Once you are finished with these steps, you’re ready to get started with this guide.
Step 1 — Installing phpMyAdmin
To get started, we will install phpMyAdmin from the default Debian repositories.
This is done by updating your server’s package index and then using the apt packaging system to pull down the files and install them on your system:
$ apt update
$ apt-get install phpmyadmin
This will ask you a few questions in order to configure your installation correctly.
Warning: When the prompt appears, “apache2” is highlighted, but not selected. If you do not hit SPACE to select Apache, the installer will not move the necessary files during installation. Hit SPACE, TAB, and then ENTER to select Apache.
For the server selection, choose apache2
Select Yes when asked whether to use dbconfig-common to set up the database
You will then be asked to choose and confirm a MySQL application password for phpMyAdmin
Note: MariaDB is a community-developed fork of MySQL, and although the two programs are closely related, they are not completely interchangeable. While phpMyAdmin was designed specifically for managing MySQL databases and makes reference to MySQL in various dialogue boxes, rest assured that your installation of MariaDB will work correctly with phpMyAdmin.
The installation process adds the phpMyAdmin Apache configuration file into the /etc/apache2/conf-enabled/ directory, where it is read automatically. The only thing you need to do is explicitly enable the mbstring PHP extension which is used to manage non-ASCII strings and convert strings to different encodings. Do this by typing:
$ phpenmod mbstring
Afterwards, restart Apache for your changes to be recognized:
$ systemctl restart apache2
phpMyAdmin is now installed and configured. However, before you can log in and begin managing your MariaDB databases, you will need to ensure that your MariaDB users have the privileges required for interacting with the program.
Step 2 — Adjusting User Authentication and Privileges
When you installed phpMyAdmin onto your server, it automatically created a database user called phpmyadmin which performs certain underlying processes for the program. Rather than logging in as this user with the administrative password you set during installation, it’s recommended that you log in using a different account.
In new installs on Debian systems, the root MariaDB user is set to authenticate using the unix_socketplugin by default rather than with a password. This allows for some greater security and usability in many cases, but it can also complicate things when you need to allow an external program (e.g., phpMyAdmin) administrative rights through this user. Because the server uses the root account for tasks like log rotation and starting and stopping the server, it is best not to change the root account’s authentication details. Since phpMyAdmin requires users to authenticate with a password, you will need to create a new MariaDB account in order to access the interface.
If you followed the prerequisite tutorial on installing a LAMP stack and created a MariaDB user account as described in Step 2, you can just log in to phpMyAdmin under that account using the password you created when you set it up by visiting this link:
If you haven’t created a MariaDB user, or if you have but you’d like to create another user just for the purpose of managing databases through phpMyAdmin, continue on with this section to learn how to set one up.
Begin by opening up the MariaDB shell:
$ mariadb
Note: If you have password authentication enabled, as you would if you’ve already created a new user account for your MariaDB server, you will need to use a different command to access the MariaDB shell. The following will run your MariaDB client with regular user privileges, and you will only gain administrator privileges within the database by authenticating:
mariadb -u user -p
From there, create a new user and give it a strong password:
CREATE USER ‘stef’@’localhost’ IDENTIFIED BY ‘password’;
Then, grant your new user appropriate privileges. For example, you could grant the user privileges to all tables within the database, as well as the power to add, change, and remove user privileges, with this command:
GRANT ALL PRIVILEGES ON *.* TO ‘sammy’@’localhost’ WITH GRANT OPTION;
Following that, exit the MariaDB shell:
exit
You can now access the web interface by visiting your server’s domain name or public IP address, followed by /phpmyadmin:
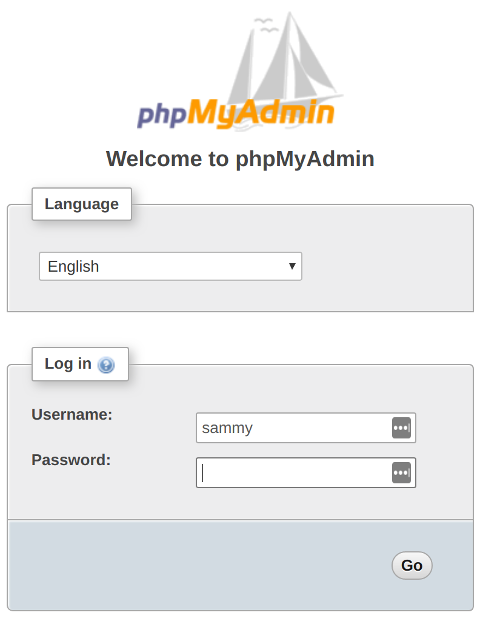
Log in to the interface with the username and password you configured.
When you log in, you’ll see the user interface, which will look something like this:
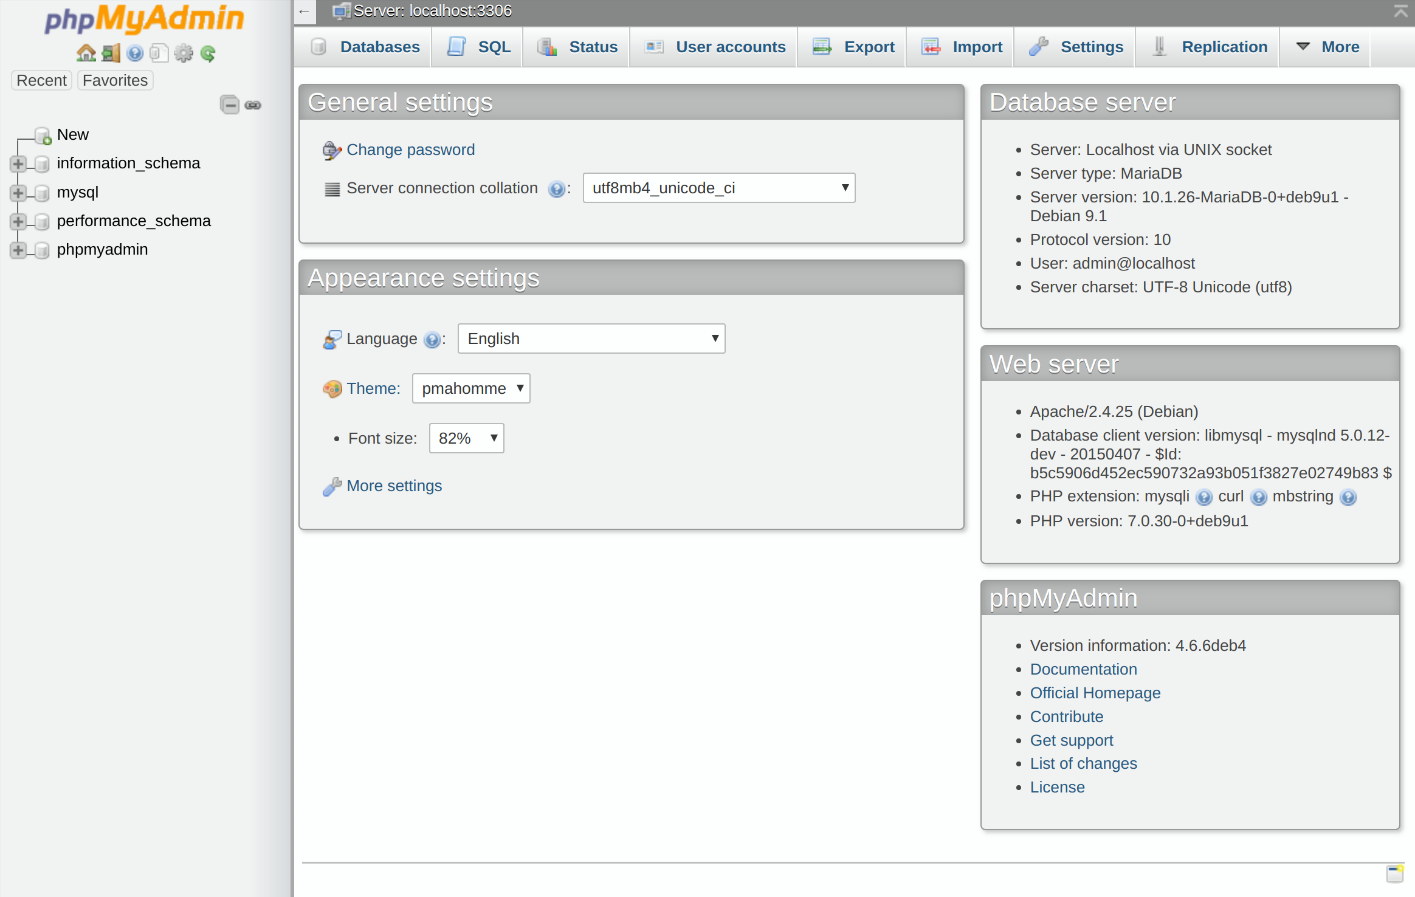
Now that you’re able to connect and interact with phpMyAdmin, all that’s left to do is harden your system’s security to protect it from attackers.
Step 3 — Securing Your phpMyAdmin Instance
Because of its ubiquity, phpMyAdmin is a popular target for attackers, and you should take extra care to prevent unauthorized access. One of the easiest ways of doing this is to place a gateway in front of the entire application by using Apache’s built-in .htaccess authentication and authorization functionalities.
To do this, you must first enable the use of .htaccess file overrides by editing your Apache configuration file.
Edit the linked file that has been placed in your Apache configuration directory:
$ nano /etc/phpmyadmin/apache.conf
Add an AllowOverride All directive within the <Directory /usr/share/phpmyadmin> section of the configuration file, like this:
/etc/apache2/conf-available/phpmyadmin.conf
<Directory /usr/share/phpmyadmin>
Options FollowSymLinks
DirectoryIndex index.php
AllowOverride All
. . .
When you have added this line, save and close the file.
To implement the changes you made, restart Apache:
$ systemctl restart apache2
Now that you have enabled .htaccess use for your application, you need to create one to actually implement some security.
In order for this to be successful, the file must be created within the application directory. You can create the necessary file and open it in your text editor with root privileges by typing:
$ nano /usr/share/phpmyadmin/.htaccess
Within this file, enter the following information:
/usr/share/phpmyadmin/.htaccess
AuthType Basic
AuthName « Restricted Files »
AuthUserFile /etc/phpmyadmin/.htpasswd
Require valid-user
Here is what each of these lines mean:
AuthType Basic: This line specifies the authentication type that you are implementing. This type will implement password authentication using a password file.
AuthName: This sets the message for the authentication dialog box. You should keep this generic so that unauthorized users won’t gain any information about what is being protected.
AuthUserFile: This sets the location of the password file that will be used for authentication. This should be outside of the directories that are being served. We will create this file shortly.
Require valid-user: This specifies that only authenticated users should be given access to this resource. This is what actually stops unauthorized users from entering.
When you are finished, save and close the file.
The location that you selected for your password file was /etc/phpmyadmin/.htpasswd. You can now create this file and pass it an initial user with the htpasswd utility:
$ htpasswd -c /etc/phpmyadmin/.htpasswd stef
You will be prompted to select and confirm a password for the user you are creating. Afterwards, the file is created with the hashed password that you entered.
If you want to enter an additional user, you need to do so without the -c flag, like this:
$ htpasswd /etc/phpmyadmin/.htpasswd additionaluser
Now, when you access your phpMyAdmin subdirectory, you will be prompted for the additional account name and password that you just configured:
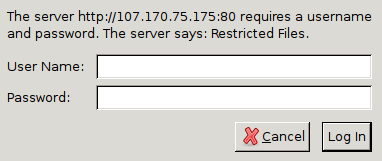
After entering the Apache authentication, you’ll be taken to the regular phpMyAdmin authentication page to enter your MariaDB credentials. This setup adds an additional layer of security, which is desirable since phpMyAdmin has suffered from vulnerabilities in the past.
Here is what each of these lines mean:
AuthType Basic: This line specifies the authentication type that you are implementing. This type will implement password authentication using a password file.
AuthName: This sets the message for the authentication dialog box. You should keep this generic so that unauthorized users won’t gain any information about what is being protected.
AuthUserFile: This sets the location of the password file that will be used for authentication. This should be outside of the directories that are being served. We will create this file shortly.
Require valid-user: This specifies that only authenticated users should be given access to this resource. This is what actually stops unauthorized users from entering.
When you are finished, save and close the file.
The location that you selected for your password file was /etc/phpmyadmin/.htpasswd. You can now create this file and pass it an initial user with the htpasswd utility:
$ htpasswd -c /etc/phpmyadmin/.htpasswd username
You will be prompted to select and confirm a password for the user you are creating. Afterwards, the file is created with the hashed password that you entered.
If you want to enter an additional user, you need to do so without the -c flag, like this:
$ htpasswd /etc/phpmyadmin/.htpasswd additionaluser
Now, when you access your phpMyAdmin subdirectory, you will be prompted for the additional account name and password that you just configured:
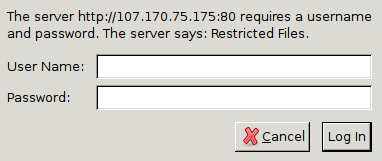
After entering the Apache authentication, you’ll be taken to the regular phpMyAdmin authentication page to enter your MariaDB credentials. This setup adds an additional layer of security, which is desirable since phpMyAdmin has suffered from vulnerabilities in the past.
How to Manually Upgrade phpMyAdmin
Last updated on December 12th, 2018
Since the release of Ubuntu 18.04 and some other Linux distros, many people have been having compatibility issues with PHP 7.2 and phpMyAdmin 4.6. In this article we will manually download and install the latest version of phpMyAdmin to resolve these issues.
It’s possible that when you installed phpMyAdmin, your repository was still serving phpMyAdmin v4.6.6 and not the latest version (v4.8.4 as of writing), which is causing compatibility issues with PHP 7.2.
Firstly, visit the phpMyAdmin download page and look for the latest version. As of writing, the latest is phpMyAdmin 4.8.4, which we will install in this guide.
1. Backup phpMyAdmin
You should backup your current phpMyAdmin folder by renaming it.
$ mv /usr/share/phpmyadmin/ /usr/share/phpmyadmin.bak
Create a new phpMyAdmin folder
$ mkdir /usr/share/phpmyadmin/
Change to directory
cd /usr/share/phpmyadmin/
2. Download and Extract phpMyAdmin
Visit the phpMyAdmin download page and look for the .tar.gz URL and download it using wget. In this guide, we are using version 4.8.4. If you are using a later version, make sure to change the commands below to match.
$ wget https://files.phpmyadmin.net/phpMyAdmin/4.9.0.1/phpMyAdmin-4.9.0.1-all-languages.tar.gz
Now extract
$ tar xzf phpMyAdmin-4.8.4-all-languages.tar.gz
Once extracted, list folder
ls
You should see a new folder phpMyAdmin-4.9-all-languages
We want to move the contents of this folder to /usr/share/phpmyadmin
$ mv phpMyAdmin-4.8.4-all-languages/* /usr/share/phpmyadmin
You can now log back into phpMyAdmin and check the current version. You may also see two errors:
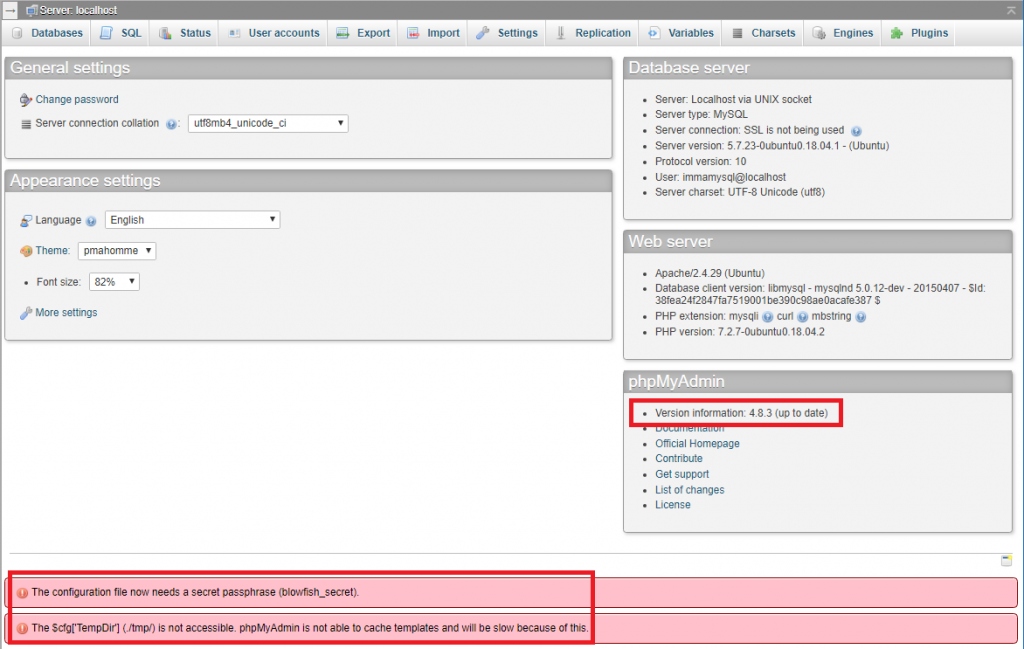
3. Edit vendor_config.php
If you are seeing an error The $cfg[‘TempDir’] (./tmp/) is not accessible. phpMyAdmin is not able to cache templates and will be slow because of this.
Open vendor_config.php
$ nano /usr/share/phpmyadmin/libraries/vendor_config.php
Press CTRL + W and search for TEMP_DIR
Change line to
/usr/share/phpmyadmin/libraries/vendor_config.php
define(‘TEMP_DIR’, ‘/var/lib/phpmyadmin/tmp/’);
You may also see an error The configuration file now needs a secret passphrase (blowfish_secret). The blowfish secret is used by phpMyAdmin for cookie authentication.

Press CTRL + W and search for CONFIG_DIR
Change line to
/usr/share/phpmyadmin/libraries/vendor_config.php
define(‘CONFIG_DIR’, ‘/etc/phpmyadmin/’);
phpMyAdmin will now generate its own blowfish secret based on the install directory.
Save file and exit. (Press CTRL + X, press Y and then press ENTER)
Now log back in to phpMyAdmin and ensure the errors are gone.
4. Cleanup
You can now delete the tar.gz file and the empty folder.
$ rm /usr/share/phpmyadmin/phpMyAdmin-4.8.4-all-languages.tar.gz
$ rm -rf /usr/share/phpmyadmin/phpMyAdmin-4.8.4-all-languages
And if you’re certain your new phpMyAdmin install is working correctly you can delete the backup folder.
$ rm -rf /usr/share/phpmyadmin.bak
Setting Up Virtual Hosts
When using the Apache web server, you can use virtual hosts (similar to server blocks in Nginx) to encapsulate configuration details and host more than one domain from a single server. We will set up a domain called example.com, but you should replace this with your own domain name. To learn more about setting up a domain name with DigitalOcean, see our Introduction to DigitalOcean DNS.
Apache on Debian 9 has one server block enabled by default that is configured to serve documents from the /var/www/html directory. While this works well for a single site, it can become unwieldy if you are hosting multiple sites. Instead of modifying /var/www/html, let’s create a directory structure within /var/www for our example.com site, leaving /var/www/html in place as the default directory to be served if a client request doesn’t match any other sites.
Create the directory for example.com as follows, using the -p flag to create any necessary parent directories:
$ mkdir -p /var/www/bremsstrahlung.fr/html
Next, assign ownership of the directory with the $USER environmental variable:
$ chown -R $USER:$USER /var/www/bremsstrahlung.fr/html
The permissions of your web roots should be correct if you haven’t modified your unmask value, but you can make sure by typing:
$ chmod -R 755 /var/www/bremsstrahlung.fr
Next, create a sample index.html page using nano or your favorite editor:
$ nano /var/www/bremsstrahlung.fr/html/index.html
Inside, add the following sample HTML:
$ /var/www/ bremsstrahlung.fr/html/index.html
<html>
<head>
<title>Welcome to Example.com!</title>
</head>
<body>
<h1>Success! The example.com server block is working!</h1>
</body>
</html>
Save and close the file when you are finished.
In order for Apache to serve this content, it’s necessary to create a virtual host file with the correct directives. Instead of modifying the default configuration file located at /etc/apache2/sites-available/000-default.conf directly, let’s make a new one at /etc/apache2/sites-available/example.com.conf:
$ nano /etc/apache2/sites-available/bremsstrahlung.fr.conf
Paste in the following configuration block, which is similar to the default, but updated for our new directory and domain name:
/etc/apache2/sites-available/bremsstrahlung.fr.conf
<VirtualHost *:80>
ServerAdmin bremsstrahlungfr@gmail.com
ServerName bremsstrahlung.fr
ServerAlias www.bremsstrahlung.fr
DocumentRoot /var/www/bremsstrahlung.fr/html
ErrorLog ${APACHE_LOG_DIR}/error.log
CustomLog ${APACHE_LOG_DIR}/access.log combined
</VirtualHost>
Notice that we’ve updated the DocumentRoot to our new directory and ServerAdmin to an email that the example.com site administrator can access. We’ve also added two directives: ServerName, which establishes the base domain that should match for this virtual host definition, and ServerAlias, which defines further names that should match as if they were the base name.
Save and close the file when you are finished.
Let’s enable the file with the a2ensite tool:
$ a2ensite bremsstrahlung.fr.conf
Disable the default site defined in 000-default.conf:
$ a2dissite 000-default.conf
Next, let’s test for configuration errors:
$ apache2ctl configtest
You should see the following output:
Output
Syntax OK
Restart Apache to implement your changes:
$ systemctl restart apache2
Apache should now be serving your domain name. You can test this by navigating to http://example.com, where you should see something like this:
Let’s encrypt
Prerequisites
To follow this tutorial, you will need:
One Debian 9 server set up by following this initial server setup for Debian 9 tutorial, including a non-root user with sudo privileges and a firewall.
A fully registered domain name. This tutorial will use example.com throughout. You can purchase a domain name on Namecheap, get one for free on Freenom, or use the domain registrar of your choice.
- Both of the following DNS records set up for your server. You can follow this introduction to DigitalOcean DNS for details on how to add them.
An A record with example.com pointing to your server’s public IP address.
An A record with www.example.com pointing to your server’s public IP address.
Apache installed by following How To Install Apache on Debian 9. Be sure that you have a virtual host file for your domain. This tutorial will use /etc/apache2/sites-available/example.com.conf as an example.
Step 1 — Installing Certbot
The first step to using Let’s Encrypt to obtain an SSL certificate is to install the Certbot software on your server.
As of this writing, Certbot is not available from the Debian software repositories by default. In order to download the software using apt, you will need to add the backports repository to your sources.list file where apt looks for package sources. Backports are packages from Debian’s testing and unstable distributions that are recompiled so they will run without new libraries on stable Debian distributions.
To add the backports repository, open (or create) the sources.list file in your /etc/apt/ directory:
$ nano /etc/apt/sources.list
At the bottom of the file, add the following line:
/etc/apt/sources.list.d/sources.list
. . .
deb http://ftp.debian.org/debian stretch-backports main
This includes the main packages, which are Debian Free Software Guidelines (DFSG)-compliant, as well as the non-free and contrib components, which are either not DFSG-compliant themselves or include dependencies in this category.
Save and close the file by pressing CTRL+X, Y, then ENTER, then update your package lists:
$ apt update
Then install Certbot with the following command. Note that the -t option tells apt to search for the package by looking in the backports repository you just added:
$ apt install python-certbot-apache -t stretch-backports
Certbot is now ready to use, but in order for it to configure SSL for Apache, we need to verify that Apache has been configured correctly.
Step 2 — Setting Up the SSL Certificate
Certbot needs to be able to find the correct virtual host in your Apache configuration for it to automatically configure SSL. Specifically, it does this by looking for a ServerName directive that matches the domain you request a certificate for.
If you followed the virtual host set up step in the Apache installation tutorial, you should have a VirtualHost block for your domain at /etc/apache2/sites-available/example.com.conf with the ServerName directive already set appropriately.
To check, open the virtual host file for your domain using nano or your favorite text editor:
$ nano /etc/apache2/sites-available/bremsstrahlung.fr.conf
Find the existing ServerName line. It should look like this, with your own domain name instead of example.com:
/etc/apache2/sites-available/example.com.conf
…
ServerName example.com;
…
If it doesn’t already, update the ServerName directive to point to your domain name. Then save the file, quit your editor, and verify the syntax of your configuration edits:
$ apache2ctl configtest
If there aren’t any syntax errors, you will see this output:
Output
Syntax OK
If you get an error, reopen the virtual host file and check for any typos or missing characters. Once your configuration file’s syntax is correct, reload Apache to load the new configuration:
$ systemctl reload apache2
Certbot can now find the correct VirtualHost block and update it.
Next, let’s update the firewall to allow HTTPS traffic.
Step 3 — Allowing HTTPS Through the Firewall
If you have the ufw firewall enabled, as recommended by the prerequisite guides, you’ll need to adjust the settings to allow for HTTPS traffic. Luckily, when installed on Debian, ufw comes packaged with a few profiles that help to simplify the process of changing firewall rules for HTTP and HTTPS traffic.
You can see the current setting by typing:
$ ufw status
If you followed the Step 2 of our guide on How to Install Apache on Debian 9, the output of this command will look like this, showing that only HTTP traffic is allowed to the web server:
Output
Status: active
To Action From
— —— —-
OpenSSH ALLOW Anywhere
WWW ALLOW Anywhere
OpenSSH (v6) ALLOW Anywhere (v6)
WWW (v6) ALLOW Anywhere (v6)
To additionally let in HTTPS traffic, allow the “WWW Full” profile and delete the redundant “WWW” profile allowance:
$ ufw allow ‘WWW Full’
$ ufw delete allow ‘WWW’
Your status should now look like this:
$ ufw status
Output
Status: active
To Action From
— —— —-
OpenSSH ALLOW Anywhere
WWW Full ALLOW Anywhere
OpenSSH (v6) ALLOW Anywhere (v6)
WWW Full (v6) ALLOW Anywhere (v6)
Next, let’s run Certbot and fetch our certificates.
Step 4 — Obtaining an SSL Certificate
Certbot provides a variety of ways to obtain SSL certificates through plugins. The Apache plugin will take care of reconfiguring Apache and reloading the config whenever necessary. To use this plugin, type the following:
$ certbot –apache -d bremsstrahlung.fr -d www.bremsstrahlung.fr
This runs certbot with the –apache plugin, using -d to specify the names you’d like the certificate to be valid for.
If this is your first time running certbot, you will be prompted to enter an email address and agree to the terms of service. After doing so, certbot will communicate with the Let’s Encrypt server, then run a challenge to verify that you control the domain you’re requesting a certificate for.
If that’s successful, certbot will ask how you’d like to configure your HTTPS settings:
Output
Please choose whether or not to redirect HTTP traffic to HTTPS, removing HTTP access.
——————————————————————————-
1: No redirect – Make no further changes to the webserver configuration.
2: Redirect – Make all requests redirect to secure HTTPS access. Choose this for
new sites, or if you’re confident your site works on HTTPS. You can undo this
change by editing your web server’s configuration.
——————————————————————————-
Select the appropriate number [1-2] then [enter] (press ‘c’ to cancel):
Select your choice then hit ENTER. The configuration will be updated, and Apache will reload to pick up the new settings. certbot will wrap up with a message telling you the process was successful and where your certificates are stored:
Output
IMPORTANT NOTES:
– Congratulations! Your certificate and chain have been saved at:
/etc/letsencrypt/live/example.com/fullchain.pem
Your key file has been saved at:
/etc/letsencrypt/live/example.com/privkey.pem
Your cert will expire on 2018-12-04. To obtain a new or tweaked
version of this certificate in the future, simply run certbot again
with the « certonly » option. To non-interactively renew *all* of
your certificates, run « certbot renew »
– Your account credentials have been saved in your Certbot
configuration directory at /etc/letsencrypt. You should make a
secure backup of this folder now. This configuration directory will
also contain certificates and private keys obtained by Certbot so
making regular backups of this folder is ideal.
– If you like Certbot, please consider supporting our work by:
Donating to ISRG / Let’s Encrypt: https://letsencrypt.org/donate
Donating to EFF: https://eff.org/donate-le
Your certificates are downloaded, installed, and loaded. Try reloading your website using https:// and notice your browser’s security indicator. It should indicate that the site is properly secured, usually with a green lock icon. If you test your server using the SSL Labs Server Test, it will get an A grade.
Let’s finish by testing the renewal process.
Step 5 — Verifying Certbot Auto-Renewal
Let’s Encrypt’s certificates are only valid for ninety days. This is to encourage users to automate their certificate renewal process. The certbot package we installed takes care of this for us by adding a renew script to /etc/cron.d. This script runs twice a day and will automatically renew any certificate that’s within thirty days of expiration.
To test the renewal process, you can do a dry run with certbot:
$ certbot renew –dry-run
If you see no errors, you’re all set. When necessary, Certbot will renew your certificates and reload Apache to pick up the changes. If the automated renewal process ever fails, Let’s Encrypt will send a message to the email you specified, warning you when your certificate is about to expire.
Owncloud
The ownCLoud 10 package is not available in default Debian 9 repositories so we will install the package from the official ownCLoud repositories. First add the ownCloud GPG key to the apt sources keyring:
$ wget -qO- https://download.owncloud.org/download/repositories/stable/Debian_9.0/Release.key | apt-key add –
once the key is added run the following command to enable the ownCLoud repository:
$ echo ‘deb https://download.owncloud.org/download/repositories/stable/Debian_9.0/ /’ | tee /etc/apt/sources.list.d/owncloud.list
Before installing the ownCLoud package we need to enable HTTPS transport for the debian apt tool by installing the following package:
$ apt install apt-transport-https
Update the apt cache list and install the ownCLoud package with the following command:
$ apt update
$ apt install owncloud-files
The command above will install the ownCLoud files in the /var/www/owncloud directory.
Everything we need is now installed on the server, so next we can finish the configuration so we can begin using the service.
Configure Apache
To configure the Apache web server to serve the ownCLoud directory create a new configuration file with the following content:
$ nano /etc/apache2/sites-available/owncloud.conf
Alias /owncloud « /var/www/owncloud/ »
<Directory /var/www/owncloud/>
Options +FollowSymlinks
AllowOverride All
<IfModule mod_dav.c>
Dav off
</IfModule>
SetEnv HOME /var/www/owncloud
SetEnv HTTP_HOME /var/www/owncloud
</Directory>
Enable the Apache ownCloud configuration:
$ a2ensite owncloud
and restart the Apache web server:
$ systemctl restart apache2
Finally set the correct permissions, so the ownCLoud can upload files:
$ chown -R www-data: /var/www/owncloud/
Step 4 – Configuring ownCloud
To access the ownCloud web interface, open a web browser and navigate to the following address:
https:// www.bremsstrahlung.fr/owncloud
Note: If you are using a self-signed SSL certificate, you will likely be presented with a warning because the certificate is not signed by one of your browser’s trusted authorities. This is expected and normal. Click the appropriate button or link to proceed to the ownCloud admin page.
You should see the ownCloud web configuration page in your browser.
Create an admin account by choosing a username and a password. For security purposes it is not recommended to use something like « admin » for the username:
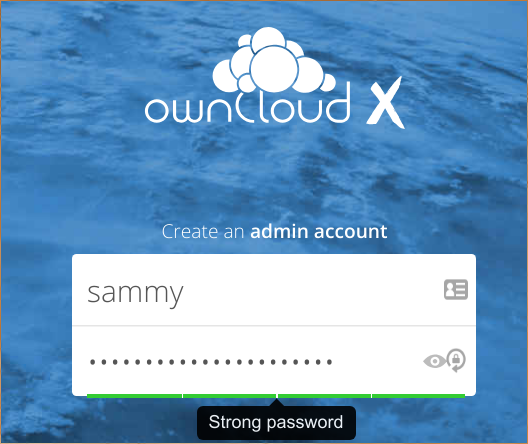
Next, leave the Data folder setting as-is and scroll down to the database configuration section.
Fill out the details of the database name, database username, and database password you created in the previous section. If you used the settings from this guide, both the database name and username will be owncloud. Leave the database host as localhost:
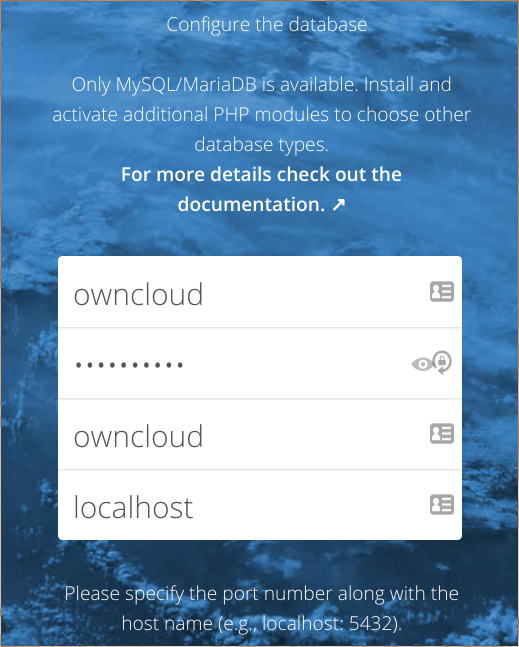
Click the Finish setup button to finish configuring ownCloud using the information you’ve provided. You will be taken to a login screen where you can sign in using your new account:
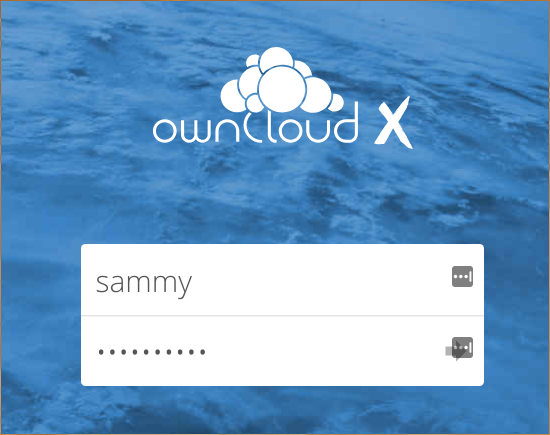
On your first login, a screen will appear where you can download applications to sync your files on various devices. You can download and configure these now or do it at a later time. When you are finished, click the x in the top-right corner of the splash screen to access the main interface:
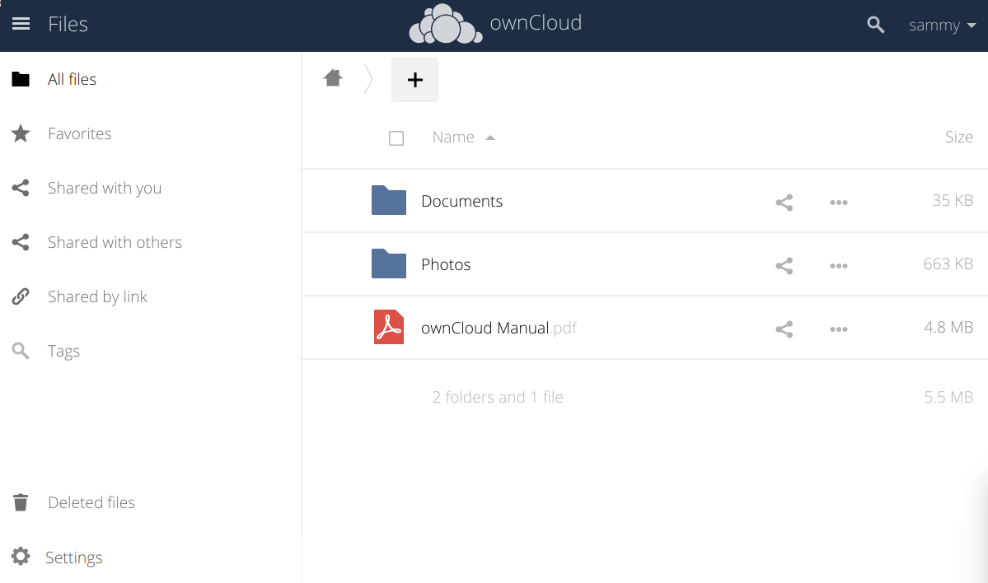
Here, you can create or upload files to your personal cloud.
Strict Transport Security HTTP Header
The “Strict-Transport-Security” HTTP header is not configured to least “15768000” seconds. For enhanced security we recommend enabling HSTS as described in our security tips.
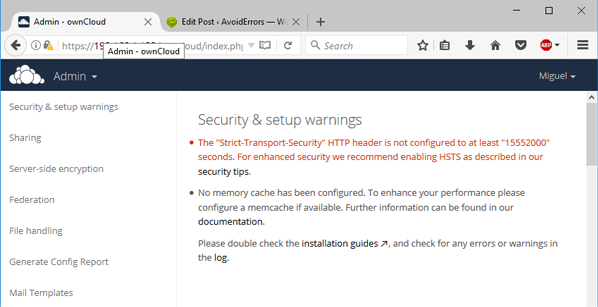
The instructions provided in their Security Documentation is good but here is a simplified solution
Access the SSl.conf file. To do this open the terminal and type:
/etc/apache2/sites-available/owncloud-ssl.conf
or
/etc/apache2/sites-available/default-ssl.conf
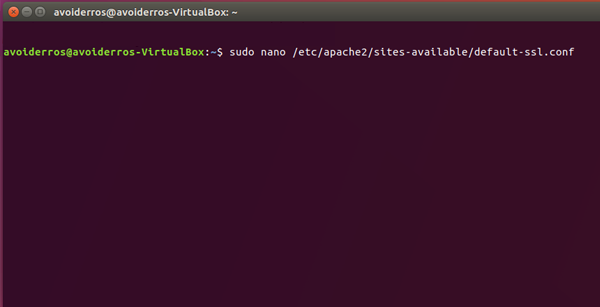
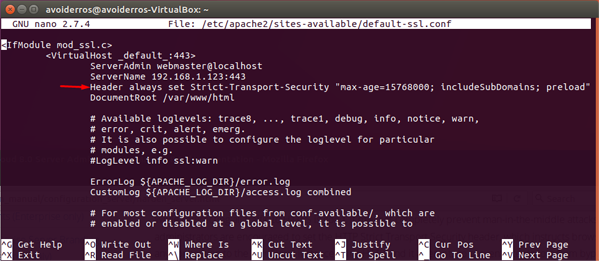
Add the following snippet of code to the SSL.conf file as shown:
Header always add Strict-Transport-Security « max-age=15768000; includeSubDomains; preload »
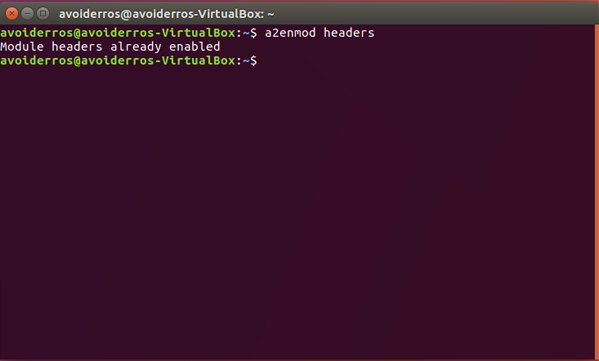
Enable module headers:
a2enmod headers
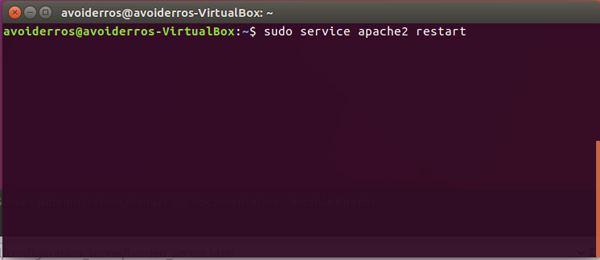
Restart your apache2 server.
sudo service apache2 restart
Memory Cache
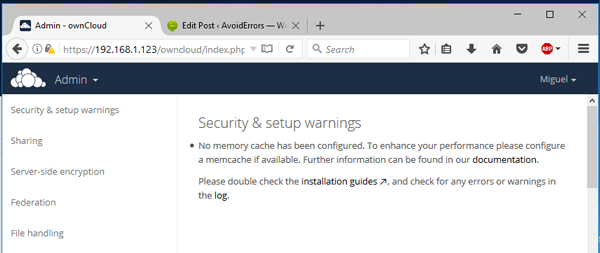
No memory cache has been configured. to enhance your performance please configure a memcache if available. further information can be found in our documentation.
1. Open the Terminal and execute the following command:
sudo -s
You’ll be prompted to enter the root user password.

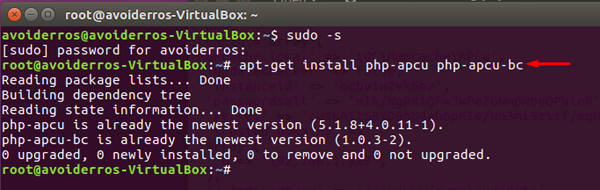
2. Now install php-apcu:
apt-get install php-apcu php-apcu-bc
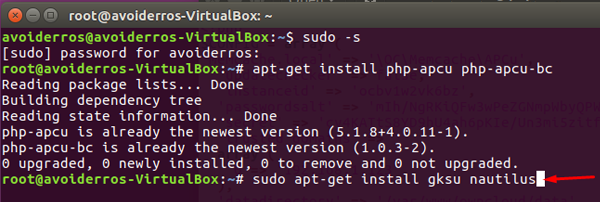
3.Then install Nautilus to be able to edit the config.php file:
apt-get update
apt-get install gksu nautilus
if the previous command did not work the use:
apt-get install nautilus
Do not close the terminal.
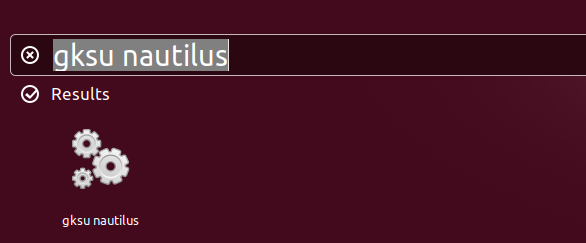
4. Once nautilus has been installed press Alt+F2 on your keyboard to open the search.
Here search for gksu Nautilus and hit enter.
5. You’ll be prompted to enter admin password.
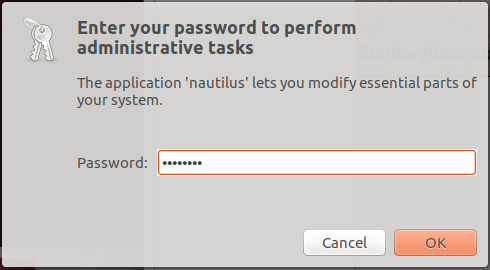
6. Once you enter the admin password the home screen will open, here go to + Other Locations -> computer.
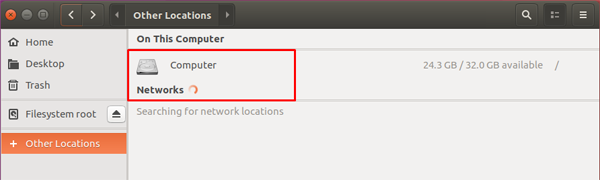
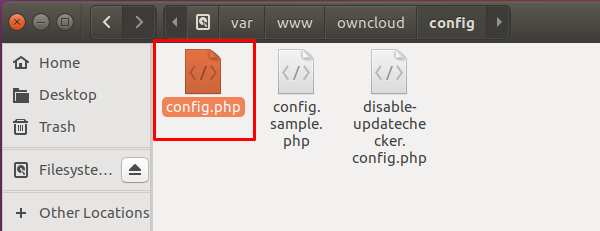
and navigate to: /var/www/owncloud/config/config.php
7. Add the following line of text to the config.php file exactly like you see it on the image below:
‘memcache.local’ => ‘\OC\Memcache\APCu’,
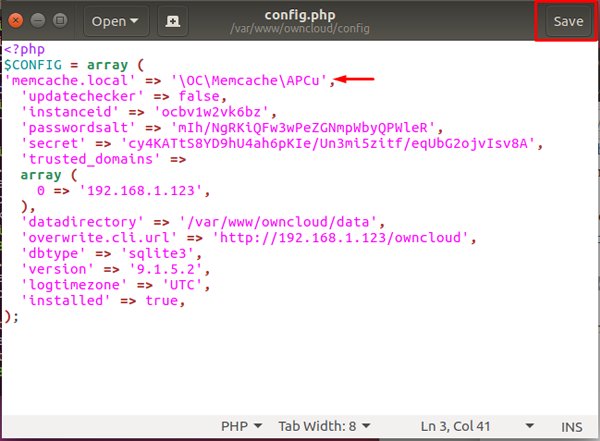
8. Once you have added the line click Save. Then go back to the terminal and re-start apache2 by executing the following command:
sudo service apache2 restart
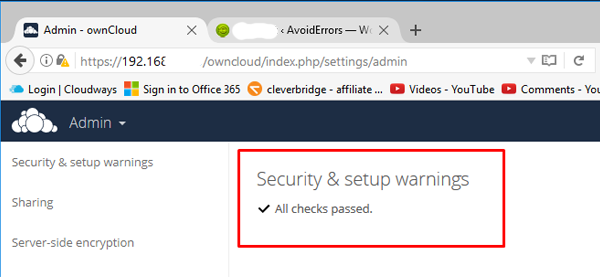
Done!! Go to the admin section of your owCloud instance and refresh, the warning should be removed. It should say All checks passed.
Mediawiki
- Download the official tarball
This can be done from a browser or by command line
cd /tmp/
wget https://releases.wikimedia.org/mediawiki/1.33/mediawiki-1.33.0.tar.gz
extract in your Web directory
tar -xvzf /tmp/mediawiki-*.tar.gz
mkdir /var/lib/mediawiki
mv mediawiki-*/* /var/lib/mediawiki
Configuration mysql
But before proceeding with the initial MediaWiki installation, there are certain steps you need to do first!
You will have to:
create a NEW mysql user (new_mysql_user):
# sudo mysql -u root -p and enter password of mysql root user (if you have not configured password it will be empty, so just press return)
mysql> CREATE USER ‘new_mysql_user’@’localhost’ IDENTIFIED BY ‘THISpasswordSHOULDbeCHANGED’;
mysql> quit;
create a NEW mysql database my_wiki:
# sudo mysql -u root
mysql> CREATE DATABASE my_wiki;
mysql> use my_wiki;
Database changed
GRANT the NEW mysql user access to the NEW created mysql database my_wiki:
mysql> GRANT ALL ON my_wiki.* TO ‘new_mysql_user’@’localhost’;
Query OK, 0 rows affected (0.01 sec)
mysql>quit;
Optional: Configure PHP
These steps are optional and can be done post-installation. MediaWiki will still work without these changes.
Edit your PHP configuration file, php.ini. On Ubuntu Trusty and Debian Jessie, it is located at /etc/php5/apache2/php.ini.
On Ubuntu Xenial and Debian Stretch (PHP 7), it is located at /etc/php/7.0/apache2/php.ini.
Maximum upload file size
Assuming that various files are going to be uploaded to the Wiki as content, the limit on the maximum size of an upload has to be adjusted. About one-half way down is the File Uploads section. Change:
upload_max_filesize = 2M
to at least 20M. You may have to adjust this again in the future if you want bigger uploads.
Memory limit
Some PHP scripts require a lot of memory to run. To increase the maximum amount of memory a script can use, page down to about 21%, and change the following entry, if found, fro
memory_limit = 8M
to
memory_limit = 128M
If it is already set to 128M or more, leave it as is.
Configure MediaWiki
Navigate your browser to http://localhost/mediawiki (for certain installations it may be http://localhost/mediawiki/config or http://wiki.hostname.com/config instead) and following the procedure given.
If this gives a 404 error then working a symbolic link should solve it:
sudo ln -s /var/lib/mediawiki /var/www/html/mediawiki
Pay close attention for « Checking environment… » in MediaWiki installation script.
This can solve a lot of problems by specifically identifying the source of any errors.
It may complain that php extensions like mbstring and xml are missing even you have installed them. Please manually activate them by using:
sudo phpenmod mbstring
sudo phpenmod xml
sudo systemctl restart apache2.service
Fill out all the field in the configuration form and press to continue button. You will have to use your username and password provided in the mysql configuration section:
mysql> CREATE USER ‘new_mysql_user’@’localhost’ IDENTIFIED BY ‘THISpasswordSHOULDbeCHANGED’;
Under Database Config, you may change the database name and DB username to new values, but you must turn on « Use superuser account », name:
debian-sys-maint
giving the mysql root password you configured earlier.
The configuration process will prompt you to download a LocalSettings.php that must be saved to the parent directory of the new wiki. The configuration page will give the exact directory/filename that must be moved:
sudo mv ~/Downloads/LocalSettings.php /var/lib/mediawiki/
And navigate your browser to http://localhost/mediawiki (or http://server_ip_address/mediawiki or http://server_ip_address/mediawiki/index.php) to see your new wiki.
Done! You now have a working Wiki
Additional wiki configuration
General information
MediaWiki is configured by the LocalSettings.php file, usually found in /var/lib/mediawiki. Manual:LocalSettings.php has detailed information that may be useful. The following are changes that appear to be universally helpful
To edit LocalSettings.php use
gksudo gedit /var/lib/mediawiki/LocalSettings.php
or from a terminal
sudo nano /var/lib/mediawiki/LocalSettings.php